
Description
FEATURES
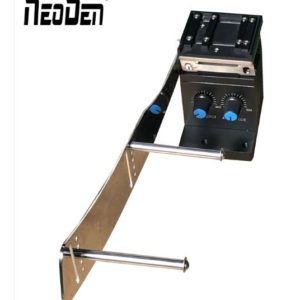
1) The same platform as printer can be selectable,easy to locate both single and double sides of PCB board,high flexibility ensure high printing precision;
2) The steel stencil can be rotated 30 degrees at most,and the precision can be kept all the way when repeat works,can be comparable with automatic machine;
3) Using the way of steel stencil movement to adjust the best position,combining with the fine adjustment of X-axis、Y-axis to correct,convenient and efficient;
4) The frame made of thickened sheetmetal,finest material,good quality with outstanding durability;the brackets using the bolt bar to adjust the height,convenient for controlling the thickness of PCB
Technical parameters
| Items | NeoDen 3040 |
| Dimensions | 580×320×260(mm) |
| Platform Size | 300×400(mm) |
| PCB Size | 250×300(mm) |
| Template Size | 370×470(mm) |
| Printing speed | Labor control |
| PCB Thickness | 0~100(mm) |
| PCB Tuning range | Front/ Side +10mm |
| Platform height | 180(mm) |
| Repeatability | ±0.01mm |
| Positioning mode | Outside/Reference hole |
| Fine Adjustment Range | Z-axis ±45mm X-axis ±35mm Y-axis ±45mm |
| Weight | 14Kg |
Notice
1) Check if the four foot pad cling the ground before operating,to ensure the printer smooth and steady without shaking;
2) Clean all the accessories of platform such as thimble, fixation unit and filler;
3) Confirm the workpiece,PCB boards and steel stencil which need to print
Operate it according to the following instructions step by step after everything has been gotten ready:
A. PCB Positioning
View the position between PCB board and the steel stencil,find out the most suitable position to locate the PCB board on the platform,Suggestion:paste a bit double sides adhesive tape to stick the PCB well if the position between PCB and steel stencil confirmed→install the steel stencil on the locating slot of the frame→paste more double sides adhesive tape on the reverse side of PCB board than steel stencil→then pressing the steel stencil→install the filler in the appropriate place between platform and PCB board→adjust the distance between the steel stencil and filler till the same thickness as PCB board(anastomose the PCB and filler),to ensure the PCB board and filler is parallel→tear the paper of double sides adhesive tape which pasted previous on the PCB board→close the steel stencil till the PCB board cement with the filler→lift the steel stencil→the PCB separate from the steel stencil and paste together in the filler of platform→find out the applicable positioning pin and install them into the fixation unit(the height of positioning pin do not exceed the thickness of PCB board)→lock the fixation unit tightly on the platform after positioning pin installed into the fixation unit with fastening,the PCB positioning operation almost finished→adjust the best position between platform and PCB board by using the X-axis adjustment handle and Y-axis adjustment handle
B. Printing
Choose the suitable scraper blade(depends on the width of printing) when printing,keep the screws tight of whole printer(specially note the ones of steel screen),otherwise it will influence the printing precision.The thickness of solder paste depends on the printing strength,an expert and excellent operator can reach the same effect as the automatic machine,it means the operator is one of the important point for printing quality.The above process is the best experience gain from our engineer and customers during practical using since a long time for your reference.Please kindly inform us if any better process and experience to improve the performance,convenient for customer high-efficiency production.

Reviews
There are no reviews yet.